Host Multiple Domains with Nginx on Ubuntu 22.04.
In a previous article, we showed you how to set up a full LEMP stack on Ubuntu 22.04 with the latest stable version of Nginx, MariaDB and PHP, which will serve as the foundation for a reliable and performance-focused hosting platform.
Nginx is a fast, lightweight and powerful web server that can also be used for reverse proxy, load balancing and caching. It is very performant and uses relatively few resources, making Nginx an ideal choice for a shared hosting platform, even on a low budget VPS with only one vCPU and a few Gigabytes of RAM.
In this article, we will learn how to configure Nginx to host multiple websites on the same server using the LEMP stack created earlier.
This tutorial requires you to be logged in as root, so switch to root user if you are not already.
sudo -i
To keep everything neatly separated, we will start by creating a new directory “/var/www/virtual” that will store all web directories and files from each of the individual hosted domains.
mkdir -p /var/www/virtual && chown -R www-data. /var/www/virtual
For security reasons, it is recommended that strict SNI compliance be enforced when using shared hosting, with requests for domain names not hosted on the web server or the IP address of both “IPv4” and “IPv6,” from the server itself being rejected for both “HTTP” and “HTTPS,” as discussed in a previous article.
To accomplish this, it is necessary to edit the default.conf file.
cat > /etc/nginx/conf.d/default.conf << EOF
server {
    listen   80 default_server;
    listen [::]:80 default_server;
    listen 443 default_server http2 ssl;
    listen [::]:443 default_server http2 ssl;

    ssl_reject_handshake on;

    server_name _;

    return 444;
}
EOF
To comply with current guidelines and security standards, a new snippet “security-headers.conf” is created with all the necessary security headers that can be easily added to a server block.
cat > /etc/nginx/global/security-headers.conf << EOF
add_header X-Frame-Options "SAMEORIGIN";
add_header 'Referrer-Policy' 'strict-origin';
add_header X-XSS-Protection "1; mode=block";
add_header X-Content-Type-Options "nosniff" always;
add_header Strict-Transport-Security "max-age=63072000; includeSubDomains; preload";
add_header Content-Security-Policy "default-src https: data: 'unsafe-inline' 'unsafe-eval'" always;
add_header Permissions-Policy "accelerometer=(), camera=(), geolocation=(), gyroscope=(), magnetometer=(), microphone=(), payment=(), usb=()";
EOF
To enable http-01 validation over HTTP to request SSL certificates, an additional snippet “acme.conf” must be created that provides an alias for the “.well-known/acme-challenge/”.
cat > /etc/nginx/global/acme.conf << EOF
location /.well-known/acme-challenge/ {
    alias /var/www/acme/.well-known/acme-challenge/;
}
EOF
Of course, we also need to make sure that the corresponding directory exists and is created.
mkdir -p -m 750 /var/www/acme/.well-known/acme-challenge && chown -R www-data. /var/www/acme
Now that all the modifications have been made, it is time to test the configuration and correct any errors before starting Nginx.
nginx -t
Which should give you the following output:
nginx: the configuration file /etc/nginx/nginx.conf syntax is ok
nginx: configuration file /etc/nginx/nginx.conf test is successful
If no errors occur, restart Nginx to implement the new configuration.
systemctl restart nginx
Now that the basics are in place we can start creating the first “virtual host” using the domain “example.com” as an example. The following steps should be used for all successive domains we wish to host on the server.
Create a variable “DOMAIN” with the value of the name of the domain for which we are creating the “virtual host”, in our case “example.com”. Make sure the necessary DNS records are in place so that the domain points to the server’s IP address for both “IPv4” and “IPv6.”
export DOMAIN="example.com"
Check if the value of the variable is correct.
echo $DOMAIN
Which should give you the domain name you entered.
example.com
If you want your website to also be available under the “www” (www.example.com) subdomain, it must be added separately to the “server_name” directive of the Nginx server block. You can also add other (sub)domains (e.g. example.net www.example.net example.eu www.example.eu sales.example.com). These are declared in the variable “ALT_DOMAINS”.
export ALT_DOMAINS="www.example.com example.net www.example.net example.eu www.example.eu sales.example.com"
If you do not have alternate domains, it is important to declare the variable “ALT_DOMAINS” anyway to prevent it from containing data from a previous process. In this case, we leave everything between the braces empty.
export ALT_DOMAINS=""
We merge the the two variables into a new variable “DOMAINS”.
if [ -z "$ALT_DOMAINS" ]; then DOMAINS=$DOMAIN; else export DOMAINS="$DOMAIN " && export DOMAINS+=$ALT_DOMAINS; fi
Create a new directory that will serve as the web root for the new virtual host.
mkdir -p /var/www/virtual/$DOMAIN/htdocs
Create a new server block.
cat > /etc/nginx/sites-available/$DOMAIN <<EOF
server {
  listen 80;
  listen [::]:80;
  server_name $DOMAINS;
  root /var/www/virtual/$DOMAIN/htdocs/;
  index index.php index.html index.htm;

  include global/acme.conf;

  access_log /var/log/nginx/$DOMAIN-access.log;
  error_log /var/log/nginx/$DOMAIN-error.log;

  location / {
    try_files \$uri \$uri/ =404;
  }

  location ~ \.php$ {
    fastcgi_pass unix:/run/php/php8.2-fpm.sock;
    include global/fastcgi-php.conf;
    include global/security-headers.conf;
  }

  location ~ /\.ht {
    deny all;
  }
}
EOF
To enable the new server block file, a symbolic link must be created from this file to the “sites-enabled” directory, from which Nginx reads during startup.
ln -s /etc/nginx/sites-available/$DOMAIN /etc/nginx/sites-enabled/
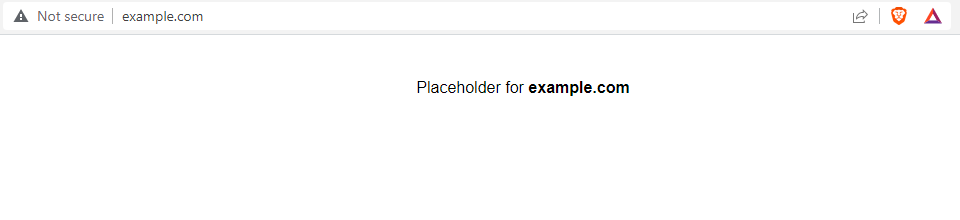
In order for our web server to actually respond when the url “http://example.com” is entered into a browser, a simple index.html file must be created to serve as a placeholder page.
cat > /var/www/virtual/$DOMAIN/htdocs/index.html <<EOF
<!DOCTYPE HTML PUBLIC "-//W3C//DTD HTML 4.01 Transitional//EN">
<html>
<head>
<title>Placeholder for $DOMAIN</title>
<meta http-equiv="Content-Type" content="text/html; charset=UTF-8">
<meta http-equiv="Cache-Control" content="no-cache">
</head>

<body bgcolor=white>
<br /><br />
<div align=center>
<font face="Arial, Helvetica">
Placeholder for <b>$DOMAIN</b>
</font>
</div>
</body>
</html>
EOF
Finally, the following commands ensure that all created folders and files are given the correct owner and permissions.
chown -R www-data. /var/www/virtual/$DOMAIN &&\
find /var/www/virtual/$DOMAIN/ -type d -exec chmod 750 {} \; &&\
find /var/www/virtual/$DOMAIN/ -type f -exec chmod 640 {} \;
To check that no errors have crept into our configuration, we will test it before restarting Nginx.
nginx -t
Which should give you the following output:
nginx: the configuration file /etc/nginx/nginx.conf syntax is ok
nginx: configuration file /etc/nginx/nginx.conf test is successful
If no errors occur, restart Nginx to implement the new configuration.
systemctl restart nginx
If all went well and you enter “http://example.com” into a browser you should get the “pageholder” page as shown in the image below.
Repeat these steps for all subsequent domains you want to host on this server.
Note that for now the page is only available in “HTTP” and not yet in “HTTPS.” In a future article, we will see how to request an SSL certificate and force the website to connect only via “HTTPS.”