How to install a LEMP stack on Ubuntu 22.04.
If you’re looking to host your own open source applications, setting up a LEMP (Linux, Nginx, MySQL/MariaDB, PHP) web stack is one of the best choices out there, if not the best. With the latest versions of Nginx, MariaDB, and PHP 8.2, you’ll have a fast and reliable platform for running a wide range of web applications.
In this step-by-step guide, we’ll walk you through the process of installing and configuring a LEMP stack on Ubuntu 22.04, so you can get started with hosting your own applications in no time.
We assume you have a VPS or other instance with a freshly installed Ubuntu 22.04 system connected to the Internet and reachable on a static IP address preferably both IPv4 and IPv6. Furthermore, this tutorial requires you to be logged in as root, so switch to root user if you are not already.
sudo -i
Update your system.
apt update && apt upgrade -y
Import and install the Nginx signing key.
wget -O- https://nginx.org/keys/nginx_signing.key | gpg --dearmor \
    -o /etc/apt/trusted.gpg.d/nginx.gpg
Although not strictly necessary, the presence of the directory ” /root/.gnupg” is required to prevent us from getting error messages during verification in the next step. So we create it first and it is created effectively only if the directory does not already exist, so that existing content is not deleted.
mkdir -p -m 600 /root/.gnupg
Verify that the downloaded file contains the proper key.
gpg --dry-run --quiet --import --import-options import-show /etc/apt/trusted.gpg.d/nginx.gpg
Which should give you the following output:
pub   rsa2048 2011-08-19 [SC] [expires: 2024-06-14]
      573BFD6B3D8FBC641079A6ABABF5BD827BD9BF62
uid                      nginx signing key <signing-key@nginx.com>
To set up the apt repository for “stable” Nginx packages, run the following command:
echo "deb http://nginx.org/packages/ubuntu `lsb_release -cs` nginx" \
    | tee /etc/apt/sources.list.d/nginx.list
If you want to go for the “mainline” version which includes the latest features and bug fixes but may also have a number of new bugs you can run the following command instead of the previous.
echo "deb http://nginx.org/packages/mainline/ubuntu `lsb_release -cs` nginx" \
    | tee /etc/apt/sources.list.d/nginx.list
Please note that for production servers the “stable” version is recommended.
Update the repository info.
apt update
Remove all existing Nginx installations. This step can be skipped on freshly installed systems.
apt purge nginx nginx-common nginx-full nginx-core
Install Nginx.
apt install nginx -y
Verify the installation and Nginx version.
nginx -v
This command should output the version number of the installed Nginx server (If you have chosen to go for the latest stable version).
nginx version: nginx/1.22.1
Enable the Nginx service to start on boot.
systemctl enable nginx
systemctl start nginx
The default configuration when installing Nginx through the Nginx repository differs from the default configuration when installing Nginx through the Ubuntu repository, specifically the directory structure and the default configuration files.
Since we don’t want to deviate from the original Ubuntu setup we will have to modify a few things to achieve this.
Create some additional directories.
mkdir /etc/nginx/{modules-available,modules-enabled,sites-available,sites-enabled,snippets,global}mkdir -p /var/www/html && chown www-data. /var/www/html
To increase security we need to add the necessary security headers, for this we will create a separate snippet we can easily include in the Nginx configuration files.
cat > /etc/nginx/global/security-headers.conf << EOF
add_header X-Frame-Options "SAMEORIGIN";
add_header 'Referrer-Policy' 'strict-origin';
add_header X-XSS-Protection "1; mode=block";
add_header X-Content-Type-Options "nosniff" always;
add_header Strict-Transport-Security "max-age=63072000; includeSubDomains; preload";
add_header Content-Security-Policy "default-src https: data: 'unsafe-inline' 'unsafe-eval'" always;
add_header Permissions-Policy "accelerometer=(), camera=(), geolocation=(), gyroscope=(), magnetometer=(), microphone=(), payment=(), usb=()";
EOF
Edit the nginx.conf file.
cat > /etc/nginx/nginx.conf <<EOF
user  www-data;
worker_processes  auto;
pid        /var/run/nginx.pid;
include /etc/nginx/modules-enabled/*.conf;
events {
    worker_connections  1024;
}
http {
    sendfile on;
    tcp_nopush on;
    tcp_nodelay on;
    types_hash_max_size 2048;

    include       global/security-headers.conf;

    server_tokens off;

    include       /etc/nginx/mime.types;
    default_type  application/octet-stream;

    ssl_protocols TLSv1 TLSv1.1 TLSv1.2 TLSv1.3; # Dropping SSLv3, ref: POODLE
    ssl_prefer_server_ciphers on;

    access_log  /var/log/nginx/access.log;
    error_log /var/log/nginx/error.log;

    gzip  on;

    include /etc/nginx/conf.d/*.conf;
    include /etc/nginx/sites-enabled/*;
}
EOF
Check the configuration.
nginx -t
Which should give you the following output:
nginx: the configuration file /etc/nginx/nginx.conf syntax is ok
nginx: configuration file /etc/nginx/nginx.conf test is successful
Restart Nginx.
systemctl restart nginx
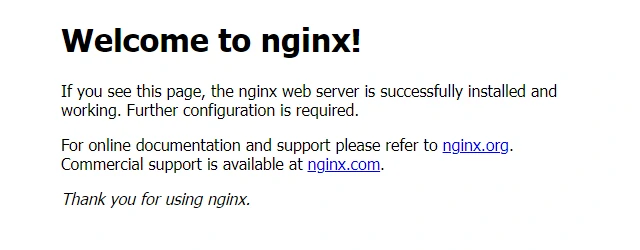
Now go to your web browser and type in the IPv4 (IPv6 will be enabled later) address of your web server.
You should now see the “Welcome to nginx” message.
We now have a Nginx web server running that depending on the underlying system and available resources (i.e. CPU, RAM & storage) and even with a fairly standard configuration will already deliver excellent performance. In upcoming articles we will further optimize the Nginx configuration to maximize performance and increase load.
Install the latest version of MariaDB.
Import and install the MariaDB signing key.
wget -O- https://mariadb.org/mariadb_release_signing_key.asc | gpg --dearmor -o /etc/apt/trusted.gpg.d/mariadb.gpg
Verify that the downloaded file contains the proper key.
gpg --dry-run --quiet --import --import-options import-show /etc/apt/trusted.gpg.d/mariadb.gpg
Which should give you the following output:
pub   rsa4096 2016-03-30 [SC]
      177F4010FE56CA3336300305F1656F24C74CD1D8
uid                      MariaDB Signing Key <signing-key@mariadb.org>
sub   rsa4096 2016-03-30 [E]
To set up the apt repository for “stable” MariaDB packages, run the following command.
echo deb http://mirror.mariadb.org/repo/10.11/ubuntu/ jammy main | tee /etc/apt/sources.list.d/mariadb.list
Note that in this example we are installing the latest version, which at the time of writing is 10.11. If you want to install a different version, just replace “10.11” with the version you want to use.
Update the repository info.
apt update
Install MariaDB.
apt install mariadb-server mariadb-client -y
Enable MariaDB so it will start at boot.
systemctl enable mariadb
Start MariaDB.
systemctl start mariadb
Check the status.
systemctl status mariadb
Run the “mysql_secure_installation” script to configure the security settings and improve MySQL server security.
mysql_secure_installation
NOTE: RUNNING ALL PARTS OF THIS SCRIPT IS RECOMMENDED FOR ALL MariaDB
      SERVERS IN PRODUCTION USE!  PLEASE READ EACH STEP CAREFULLY!

In order to log into MariaDB to secure it, we'll need the current
password for the root user. If you've just installed MariaDB, and
haven't set the root password yet, you should just press enter here.

Enter current password for root (enter for none):
OK, successfully used password, moving on...

Setting the root password or using the unix_socket ensures that nobody
can log into the MariaDB root user without the proper authorisation.

You already have your root account protected, so you can safely answer 'n'.

Switch to unix_socket authentication [Y/n] Y
Enabled successfully!
Reloading privilege tables..
 ... Success!


You already have your root account protected, so you can safely answer 'n'.

Change the root password? [Y/n] n
 ... skipping.

By default, a MariaDB installation has an anonymous user, allowing anyone
to log into MariaDB without having to have a user account created for
them.  This is intended only for testing, and to make the installation
go a bit smoother.  You should remove them before moving into a
production environment.

Remove anonymous users? [Y/n] Y
 ... Success!

Normally, root should only be allowed to connect from 'localhost'.  This
ensures that someone cannot guess at the root password from the network.

Disallow root login remotely? [Y/n] Y
 ... Success!

By default, MariaDB comes with a database named 'test' that anyone can
access.  This is also intended only for testing, and should be removed
before moving into a production environment.

Remove test database and access to it? [Y/n] Y
 - Dropping test database...
 ... Success!
 - Removing privileges on test database...
 ... Success!

Reloading the privilege tables will ensure that all changes made so far
will take effect immediately.

Reload privilege tables now? [Y/n] Y
 ... Success!

Cleaning up...

All done!  If you've completed all of the above steps, your MariaDB
installation should now be secure.

Thanks for using MariaDB!
Check the installed version.
mariadb -V
Which should give you the following output:
mariadb Ver 15.1 Distrib 10.11.2-MariaDB, for debian-linux-gnu (x86_64) using EditLine wrapper
Although MariaDB has been using “InnoDB” as its default storage engine since version 5.5, it is still recommended to double check.
mariadb -e "show engines;" | grep DEFAULT | awk '{print $1}'Which should give you the following output:
InnoDB
Connect to MariaDB.
mariadb
Which should give you the following output:
Welcome to the MariaDB monitor.  Commands end with ; or \g.
Your MariaDB connection id is 42
Server version: 10.11.2-MariaDB-1:10.11.2+maria~ubu2204 mariadb.org binary distribution

Copyright (c) 2000, 2018, Oracle, MariaDB Corporation Ab and others.

Type 'help;' or '\h' for help. Type '\c' to clear the current input statement.

MariaDB [(none)]>
Type “quit” and push enter to exit.
MariaDB [(none)]> quit
Bye
At the time of writing, PHP 8.2 is not available as a package in the standard Ubuntu 22.04 repository. However, there is a PPA (Personal Package Archive) available, maintained by Ondřej Surý, who has been compiling packages for Debian since PHP 5 and is considered very reliable. The main repositories now contain both PHP 5.6, PHP 7.0-7.4 and PHP 8.0-8.2 that can be installed together.
Add the Ondrej PPA to our repository.
add-apt-repository ppa:ondrej/php
Update the repository info.
apt update
Install the most commonly used php-extensions including php-fpm module required by Nginx to handle PHP requests.
apt install php-common php-pear php8.2 php8.2-cli php8.2-common php8.2-curl php8.2-dev php8.2-fpm php8.2-gd php8.2-igbinary php8.2-imagick php8.2-imap php8.2-intl php8.2-mbstring php8.2-mysql php8.2-opcache php8.2-readline php8.2-redis php8.2-soap php8.2-xml php8.2-xmlrpc php8.2-zip -y
Enable php8.2-fpm so it will start at boot.
systemctl enable php8.2-fpm
Start php8.2-fpm.
systemctl start php8.2-fpm
Check status.
systemctl status php8.2-fpm
Create a new file called “fastcgi.conf”.
cat > /etc/nginx/global/fastcgi-params.conf <<EOF

fastcgi_param  SCRIPT_FILENAME    \$document_root\$fastcgi_script_name;
fastcgi_param  QUERY_STRING       \$query_string;
fastcgi_param  REQUEST_METHOD     \$request_method;
fastcgi_param  CONTENT_TYPE       \$content_type;
fastcgi_param  CONTENT_LENGTH     \$content_length;

fastcgi_param  SCRIPT_NAME        \$fastcgi_script_name;
fastcgi_param  REQUEST_URI        \$request_uri;
fastcgi_param  DOCUMENT_URI       \$document_uri;
fastcgi_param  DOCUMENT_ROOT      \$document_root;
fastcgi_param  SERVER_PROTOCOL    \$server_protocol;
fastcgi_param  REQUEST_SCHEME     \$scheme;
fastcgi_param  HTTPS              \$https if_not_empty;

fastcgi_param  GATEWAY_INTERFACE  CGI/1.1;
fastcgi_param  SERVER_SOFTWARE    nginx/\$nginx_version;

fastcgi_param  REMOTE_ADDR        \$remote_addr;
fastcgi_param  REMOTE_PORT        \$remote_port;
fastcgi_param  REMOTE_USER        \$remote_user;
fastcgi_param  SERVER_ADDR        \$server_addr;
fastcgi_param  SERVER_PORT        \$server_port;
fastcgi_param  SERVER_NAME        \$server_name;

# PHP only, required if PHP was built with --enable-force-cgi-redirect
fastcgi_param  REDIRECT_STATUS    200;
EOF
Create a new snippets called “fastcgi-php.conf”.
cat > /etc/nginx/global/fastcgi-php.conf <<EOF
# regex to split $uri to $fastcgi_script_name and $fastcgi_path
fastcgi_split_path_info ^(.+?\.php)(/.*)$;

# Check that the PHP script exists before passing it
try_files \$fastcgi_script_name =404;

# Bypass the fact that try_files resets $fastcgi_path_info
# see: http://trac.nginx.org/nginx/ticket/321
set \$path_info \$fastcgi_path_info;
fastcgi_param PATH_INFO \$path_info;

fastcgi_index index.php;
include global/fastcgi-params.conf;
EOF
Edit the “default.conf” file.
cat > /etc/nginx/conf.d/default.conf <<EOF
server {
  listen 80;
  listen [::]:80;
  server_name _;
  root /usr/share/nginx/html/;
  index index.php index.html index.htm;

  location / {
    try_files \$uri \$uri/ =404;
  }

  location ~ \.php$ {
    fastcgi_pass unix:/run/php/php8.2-fpm.sock;
    include global/fastcgi-php.conf;
  }

  location ~ /\.ht {
    deny all;
  }
}
EOF
To test our configuration create a php file “info.php” with the “phpinfo()” function.
echo "<?php phpinfo(); ?>" > /usr/share/nginx/html/info.php
The values and limits for php specified by default in the php.ini file are rather sparse and are insufficient for most applications. To avoid problems, we are going to modify a few values already although they can be modified later according to the needs of the application to be used. These values are server-wide.
cat > /etc/php/8.2/fpm/conf.d/60-custom.ini <<EOF
memory_limit = 512M
upload_max_filesize = 256M
post_max_size = 384M
max_execution_time = 360
opcache.enable=1
opcache.validate_timestamps=1
opcache.memory_consumption = 512
opcache.interned_strings_buffer = 32
opcache.max_accelerated_files = 50000
opcache.revalidate_freq = 60
opcache.fast_shutdown=1
expose_php = off
EOF
systemctl restart nginx php8.2-fpm
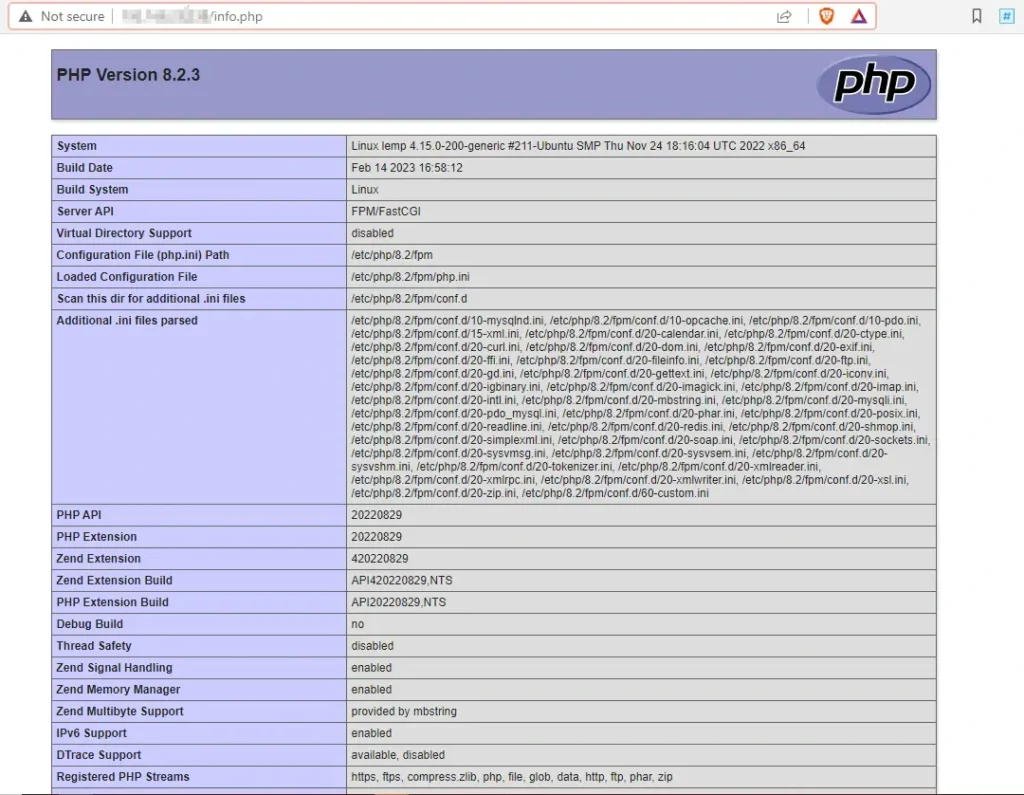
To check whether php is working by entering “server-ip-address/info.php” in the browser address bar. Replace server-ip-address with your actual IPv4 or IPv6 address.
You should now see the “phpinfo” page with all the relevant php information.
For security reasons, it is recommended to delete the info.php file after determining that PHP is working properly.
rm /usr/share/nginx/html/info.php
By default, Nginx will not restart automatically if the process is somehow stopped and the web server crashes. To change this, we need to change the default Nginx systemd configuration.
To override the default systemd service configuration for Nginx we need to create a separate directory called “nginx.service.d”.
mkdir -p /etc/systemd/system/nginx.service.d/
Create a file under this directory called restart.conf and add the code required to restart Nginx. In this example we have chosen to restart Nginx after 10 seconds.
echo -e "[Service]\nRestart=always\nRestartSec=10s" > /etc/systemd/system/nginx.service.d/restart.conf
Reload systemd for the changes to take effect.
systemctl daemon-reload
Restart Nginx.
systemctl restart nginx
Check status
systemctl status nginx
Kill all processes manually to check if Nginx indeed restarts after 10 seconds.
pkill nginx
Check again immediately after the “pkill” command which should show you Nginx is not running.
systemctl status nginx
Repeat the same command after 10 seconds which should show Nginx has restarted and is running fine.
To ensure php8.2-fpm automatically restarts if the process is somehow stopped we need to override the default system service configuration for php8.2-fpm, by create=ing a separate directory called “php8.2-fpm.service.d.”
mkdir -p /etc/systemd/system/php8.2-fpm.service.d/
Create a file under this directory called restart.conf and add the code required to restart php8.2-fpm. In this example we have chosen to restart Nginx after 10 seconds.
echo -e "[Service]\nRestart=always\nRestartSec=10s" > /etc/systemd/system/php8.2-fpm.service.d/restart.conf
Reload systemd for the changes to take effect.
systemctl daemon-reload
Restart php8.2-fpm.
systemctl restart php8.2-fpm
Check status
systemctl status php8.2-fpm
Kill all processes manually to check if php8.2-fpm indeed restarts after 10 seconds.
pkill php-fpm
Check again immediately after the “pkill” command which should show you php8.2-fpm is not running.
systemctl status php8.2-fpm
Repeat the same command after 10 seconds which should show php8.2-fpm has restarted and is running fine.
Although MariaDB restarts “on-abort” by default, this is not the case when MariaDB crashes. To solve this, we need to adjust some settings of the systemd service unit.
To override the default systemd service configuration for MariaDB we need to create a separate directory called “mariadb.service.d”.
mkdir -p /etc/systemd/system/mariadb.service.d/
Create a file under this directory called restart.conf and add the code required to restart MariaDB. In this example we have chosen to restart MariaDB after 10 seconds.
echo -e "[Service]\nRestart=always\nRestartSec=10s" > /etc/systemd/system/mariadb.service.d/restart.conf
Reload systemd for the changes to take effect.
systemctl daemon-reload
Restart MariaDB.
systemctl restart mariadb
Check status
systemctl status mariadb
Kill aal MariaDB processes manually.
pkill mariadb
Check again immediately after the “pkill” command which should show you MariaDB is not running.
systemctl status mariadb
Repeat the same command after 10 seconds which should show MariaDB has restarted and is running fine.
Although you may have already protected your host (VPS, container…) from attacks and intrusions in other ways, UFW (Uncomplicated Firewall) can be enabled to protect our web server and allow only ports that are effectively used, so in our case port 80, 443 and of course 22 (or alternative port on which SSH is running) when connecting via SSH.
Check the present status of UFW which by default should be “inactive”.
ufw status verbose
Which should give you the following output:
Status: inactive
Allow all connections on port 80 and 443, both IPv4 and IPv6.
ufw allow proto tcp from any to any port 80,443
Rules updated
Rules updated (v6)
IMPORTANT: If connecting to the host via SSH, make sure the port on which SSH is listening (port 22 by default) is also allowed before enabling the firewall (UFW)! Ports for access from other applications can be allowed later.
Allow all connections on ssh (port 22), both IPv4 and IPv6.
ufw allow ssh
Or if you are running SSH on an alternative port e.g. 2244
ufw allow 2244
Enable UFW.
ufw enable
Firewall is active and enabled on system startup
Check status
ufw status verbose
Status: active
Logging: on (low)
Default: deny (incoming), allow (outgoing), deny (routed)
New profiles: skip

To                         Action      From
--                         ------      ----
80,443/tcp                 ALLOW IN    Anywhere
22                         ALLOW IN    Anywhere
22/tcp                     ALLOW IN    Anywhere
80,443/tcp (v6)            ALLOW IN    Anywhere (v6)
22 (v6)                    ALLOW IN    Anywhere (v6)
22/tcp (v6)                ALLOW IN    Anywhere (v6)
Now that we have a fully up-to-date LEMP stack set up, in the next few posts we will take a closer look at expanding the system, improving security and boosting performance.